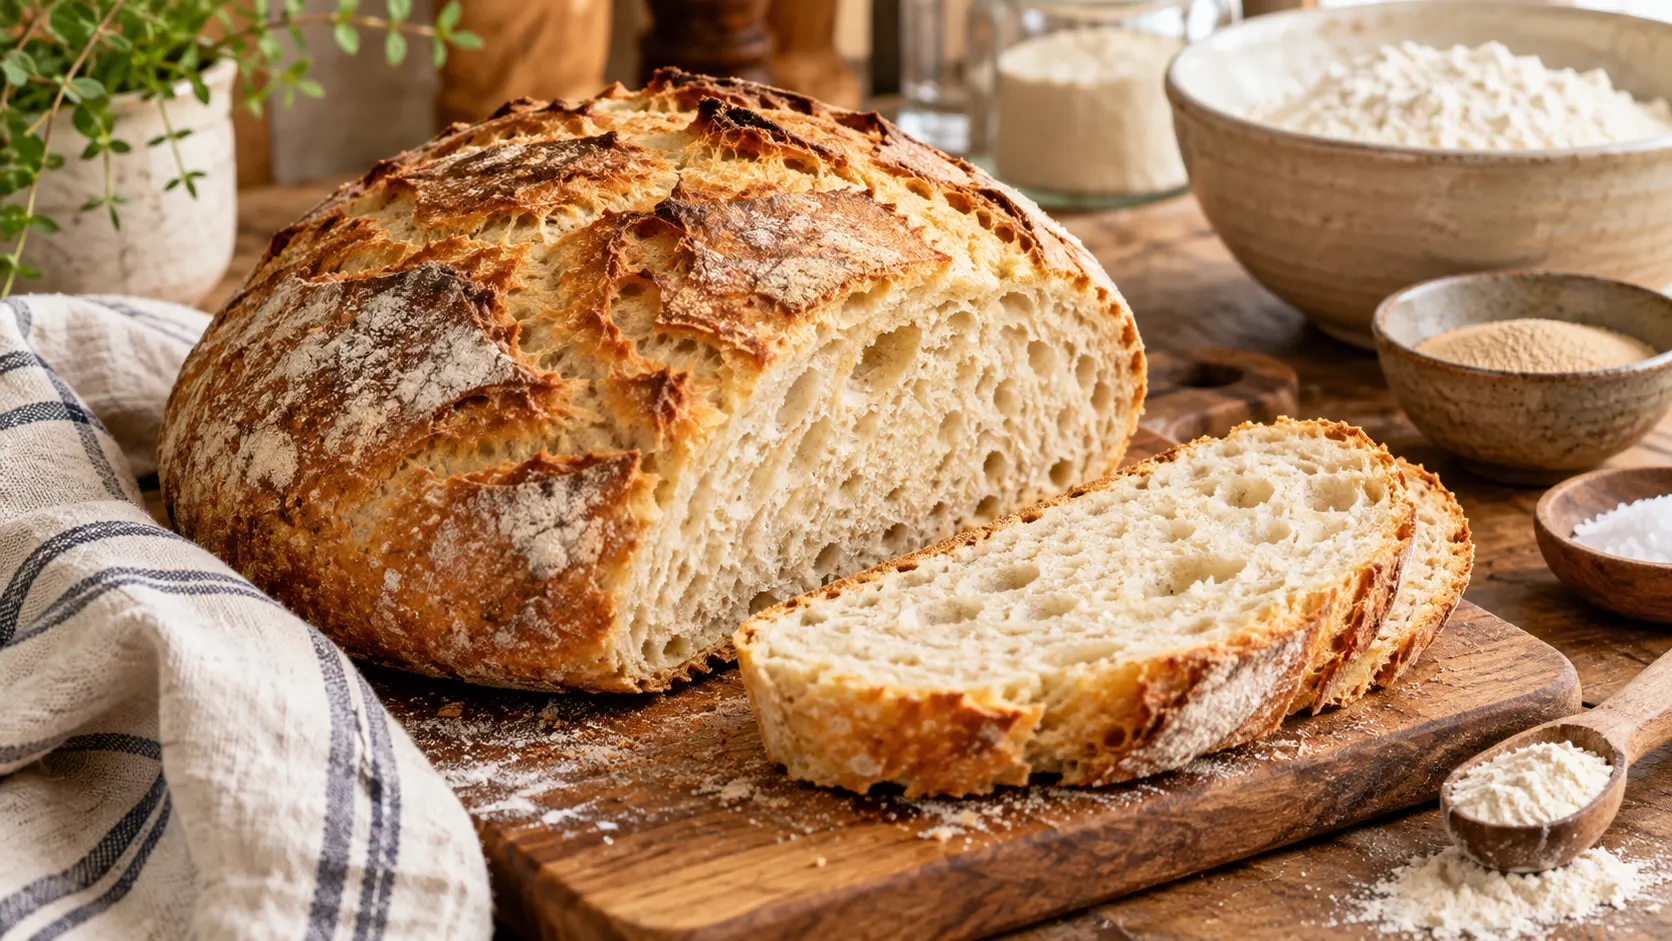
Making homemade sourdough bread may sound complicated, especially when most traditional recipes require a sourdough starter that takes several days to prepare. Fortunately, you can create delicious, sourdough-style bread without maintaining a traditional starter. With a few simple ingredients, basic kitchen equipment, and the right techniques, you can bake a beautiful loaf with a crisp golden crust, soft interior, and pleasantly tangy flavor.
Traditional sourdough bread relies on a fermented starter containing wild yeast and lactic acid bacteria. However, a sourdough bread recipe without starter can use commercial yeast and a small amount of an acidic ingredient to create a similar taste and texture. Although the result is not authentic naturally leavened sourdough, it offers a convenient alternative for beginners who want homemade artisan-style bread.
In this guide, you will learn how to make sourdough-style bread without starter, including the ingredients, preparation steps, fermentation methods, baking techniques, and common mistakes to avoid. You will also discover practical tips for achieving a crispy crust, airy crumb, and delicious homemade flavor.
Can You Make Sourdough Bread Without a Starter?
Traditional sourdough bread requires a fermented starter because it provides natural yeast and bacteria that help the dough rise and develop its characteristic flavor. Without this starter, flour and water alone will not reliably produce a risen loaf within a normal baking schedule. However, commercial yeast provides a convenient alternative. It allows you to prepare sourdough-style bread without maintaining a culture.
A starter-free recipe typically combines bread flour, water, salt, and commercial yeast with optional ingredients that provide mild acidity. Plain yogurt, vinegar, or a small amount of lemon juice can contribute tangy notes. These ingredients do not reproduce the complex fermentation process of authentic sourdough. Nevertheless, careful preparation can produce satisfying homemade bread with a similar artisan appearance.
The biggest advantage of making sourdough-style bread without starter is convenience. You can begin preparing dough without spending several days developing and feeding a starter. This method is especially suitable for beginners, occasional bakers, and anyone who prefers a simpler baking routine. The finished bread can still have excellent texture, flavor, and a beautifully browned crust.
Ingredients for Sourdough Bread Without Starter
A successful loaf begins with a short list of ingredients that work together to create structure, flavor, and proper fermentation. Bread flour provides gluten-forming proteins, while water hydrates the flour and helps develop the dough. Commercial yeast produces the gas responsible for rising. Salt strengthens flavor and helps regulate yeast activity during fermentation.
For one medium loaf, use 500 grams of bread flour, 330 grams of lukewarm water, 7 grams of instant yeast, and 10 grams of salt. Add 20 grams of plain unsweetened yogurt and 10 grams of apple cider vinegar for a mildly tangy flavor. This combination creates a manageable dough with enough hydration to produce a relatively open crumb.
The yogurt and vinegar are optional flavor ingredients rather than substitutes for yeast. If you leave them out, the bread will taste more like a conventional artisan loaf. Use an accurate kitchen scale whenever possible because flour measurements can vary considerably when measured by volume. Consistent ingredient quantities make the recipe easier to repeat successfully.
Essential Kitchen Tools for Homemade Sourdough-Style Bread
You do not need expensive bakery equipment to make sourdough-style bread without starter. A large mixing bowl, measuring scale, sturdy spoon, and clean kitchen towel are enough for basic dough preparation. A bench scraper can make sticky dough easier to handle. These simple tools help maintain an organized workspace and make each preparation stage more convenient.
A Dutch oven is especially useful for producing a crisp crust because its covered environment traps moisture released by the dough. This moisture delays crust formation during the early baking stage, allowing the loaf to expand. A heavy baking tray can also work when used with an appropriate steam-producing method. Always follow cookware temperature limits and safety instructions.
A sharp bread lame or suitable kitchen blade can be used to score the dough before baking. A cooling rack allows air to circulate beneath the finished loaf, helping prevent a damp bottom crust. An instant-read thermometer can also help assess doneness. While these tools improve consistency, most are optional for beginners.
How to Prepare the Dough Without a Sourdough Starter
Begin by placing the bread flour, instant yeast, and salt into a large mixing bowl. Stir the dry ingredients together until evenly distributed. In a separate container, combine the lukewarm water, plain yogurt, and apple cider vinegar. Add the liquid mixture to the flour and stir until no dry flour remains.
The dough will initially appear rough and slightly sticky, which is normal for a relatively hydrated bread recipe. Allow it to rest for approximately 15 to 20 minutes after mixing. This resting period gives the flour time to absorb moisture and makes the dough easier to handle. Cover the bowl to prevent the surface from drying out.
After resting, gently work the dough until the ingredients form a cohesive mixture. You can knead it briefly or use a series of stretch-and-fold movements. Avoid adding excessive flour simply because the dough feels sticky. A lightly dampened hand or bench scraper can make handling easier while preserving the intended hydration.
Step-by-Step Stretch and Fold Technique
Stretching and folding helps strengthen bread dough without requiring extensive traditional kneading. Begin by lifting one edge of the dough from the bowl and gently stretching it upward. Fold that section over the center of the dough. Rotate the bowl and repeat the process with the remaining sides.
Complete approximately four folds during one session, working carefully to avoid tearing the dough. Cover the bowl and allow the mixture to rest for about 20 minutes. Repeat the stretch-and-fold process two or three times during the early fermentation period. The dough should gradually become smoother, more elastic, and better able to hold its shape.
This technique supports gluten development, which helps trap gas produced by yeast during fermentation. Stronger dough can expand more evenly and create a lighter finished crumb. However, aggressive stretching may damage a developing gluten structure. Work gently and allow sufficient resting time between folding sessions.
How Long Should the Dough Rise?
The first rise, commonly called bulk fermentation, allows yeast to produce carbon dioxide and expand the dough. With the yeast quantity in this recipe, the initial rise may take approximately 60 to 90 minutes in a comfortably warm kitchen. Actual timing depends on room temperature, flour characteristics, and yeast activity. Observe the dough rather than relying exclusively on a clock.
During bulk fermentation, the dough should become noticeably larger and develop a slightly airy appearance. It may approach double its original volume, although exact expansion varies. A container with straight sides can make growth easier to monitor. Avoid allowing the dough to rise far beyond its structure because excessive fermentation may cause it to weaken.
For additional flavor development, consider using less yeast and extending fermentation under controlled conditions. Longer fermentation can create more complex bread flavors, although it still does not reproduce traditional sourdough fermentation. The correct timing must match the adjusted yeast quantity and temperature. Beginners should first become comfortable with the standard recipe before experimenting.
How to Shape Sourdough-Style Bread Without Starter
Once the dough has completed its first rise, transfer it carefully onto a lightly floured work surface. Avoid pressing out all the trapped gas because some internal air helps create the finished crumb. Gently fold the dough toward its center to establish a rounded shape. Allow it to rest briefly if it resists stretching.
To create a round loaf, bring the outer edges toward the center and turn the dough seam-side down. Use gentle movements across the work surface to develop surface tension. This outer tension helps the loaf hold its shape during its final rise. Avoid pulling so tightly that the surface tears.
A proofing basket can support the shaped dough, but a bowl lined with a well-floured clean kitchen towel also works. Place the dough seam-side up inside the prepared container. Cover it loosely to prevent drying. The loaf is now ready for its final proof before baking.
Final Proofing Tips for a Better Bread Texture
Final proofing gives the shaped loaf time to expand before entering the oven. For this recipe, the process may take approximately 30 to 60 minutes at room temperature. Warmer conditions often accelerate fermentation, while cooler environments slow it down. The dough should appear slightly fuller and feel airy without losing its structure.
A gentle finger-press test can provide a useful indication of readiness. Lightly press a floured fingertip into the dough and observe how the indentation responds. If it springs back immediately, additional proofing may be needed. If it returns slowly while leaving a slight impression, the loaf may be ready for baking.
Avoid allowing the dough to become excessively inflated or fragile during the final rise. Overproofed dough may spread outward or collapse when moved. Underproofed dough can expand unevenly and develop an overly dense interior. Learning to recognize dough texture and expansion is more reliable than following a fixed proofing time.
How to Bake Sourdough Bread Without Starter
Preheat the oven to 230°C (450°F), placing a suitable Dutch oven inside while it heats if the manufacturer permits empty preheating. Carefully transfer the shaped dough onto baking parchment rated for the intended temperature. Score the top with a shallow cut to guide expansion during baking. Use appropriate oven protection when handling hot cookware.
Place the dough inside the preheated Dutch oven and cover it with the lid. Bake for approximately 20 minutes to retain steam around the loaf. Remove the lid carefully and continue baking for another 20 to 25 minutes until the crust becomes deeply golden. Baking time may vary depending on loaf size and oven performance.
The finished loaf should have a firm crust and feel relatively light for its size. An internal temperature around 96°C to 99°C (205°F to 210°F) is a useful indication that lean bread is baked through. Transfer the loaf to a cooling rack. Allow it to cool for at least one hour before slicing to help the crumb finish setting.
How to Get a Crispy Sourdough-Style Crust
A crisp crust is one of the most appealing features of homemade artisan bread. High initial baking temperatures encourage rapid oven spring and surface browning. Steam helps delay crust formation during the early baking stage, giving the dough more time to expand. A covered Dutch oven provides a convenient way to create this environment.
Removing the Dutch oven lid during the later stage allows moisture to escape and encourages crust development. The bread becomes darker as browning reactions occur on the surface. Avoid removing the loaf too early simply because it looks lightly golden. A deeper brown crust can provide additional flavor, provided the bread does not burn.
Cooling also affects crust texture because moisture continues moving through the loaf after baking. Cutting bread immediately can release steam and leave the interior gummy. Place the loaf on a wire rack rather than a solid surface. This helps reduce trapped moisture underneath the bread and preserves a more satisfying crust.
How to Create a Soft and Airy Bread Crumb
The crumb refers to the interior structure of bread, including its softness, elasticity, and distribution of air pockets. A good crumb depends on sufficient hydration, proper gluten development, and controlled fermentation. This recipe produces an artisan-style texture with irregular air spaces. However, it may differ from the crumb of a long-fermented traditional sourdough loaf.
Avoid adding excessive flour during mixing or shaping because doing so reduces hydration and can produce a tighter crumb. Gentle folding helps strengthen the dough while preserving its moisture content. Proper proofing allows yeast to generate the gas necessary for expansion. These factors work together to influence the finished texture.
A dense loaf may result from insufficient fermentation, weak dough development, or incorrect baking conditions. Excessive fermentation can also weaken the structure and cause collapse. Small adjustments to dough handling and proofing time may improve later batches. Consistency comes from observing how the dough behaves rather than changing several ingredients at once.
How to Make Sourdough Bread Taste Tangy Without Starter
Traditional sourdough develops its distinctive tang through fermentation involving lactic acid bacteria and wild yeast. A commercial yeast loaf does not create the same complex flavor profile during a short rise. However, ingredients such as plain yogurt and apple cider vinegar can introduce mild acidity. The result is a sourdough-inspired taste rather than authentic sourdough fermentation.
Using small amounts of acidic ingredients is important because excessive vinegar can create an unpleasantly sharp flavor. Plain unsweetened yogurt generally adds a softer tang and contributes some moisture. Different products may vary in acidity, affecting the final taste. Starting with modest quantities makes it easier to adjust later recipes.
Longer, controlled yeast fermentation can also improve bread flavor by allowing additional fermentation byproducts to develop. A small amount of commercial yeast is generally more suitable for an extended rise than the full quantity used in quick recipes. Adjusting fermentation requires care and observation. Flavor development should never come at the expense of proper dough structure.
Overnight Sourdough-Style Bread Without Starter
An overnight fermentation method can be useful for people who want to prepare dough ahead of time. Instead of using the full 7 grams of instant yeast, reduce the amount to approximately 1 gram for a longer refrigerated process. Mix the ingredients and perform the initial folding sessions. Allow fermentation to begin briefly before placing the covered dough in the refrigerator.
The dough can remain refrigerated for approximately 8 to 14 hours while fermentation continues slowly. Cold temperatures reduce yeast activity and allow more gradual flavor development. The exact timing depends on refrigerator temperature and dough condition. The dough should develop some expansion without becoming excessively weak or overfermented.
After refrigeration, allow the dough to become manageable before shaping if necessary, then complete the final proof according to its condition. Cold dough can sometimes be shaped or baked with adjusted handling methods, depending on the recipe. Avoid treating overnight fermentation as a fixed process that works identically in every kitchen. Monitor the dough carefully for the best results.
Common Mistakes When Making Bread Without Starter
One common mistake is using water that is too hot when mixing commercial yeast into the dough. Excessive heat can damage yeast and prevent normal fermentation. Lukewarm water is generally sufficient for convenient mixing, although instant yeast does not require separate activation. Following the yeast manufacturer’s instructions helps maintain consistent results.
Another mistake is adding too much flour to eliminate stickiness. Artisan-style dough often feels slightly tacky, particularly before gluten development improves. Excessive flour can produce a dense loaf with limited expansion. Using lightly dampened hands and allowing short resting periods can make dough handling easier without changing the ingredient balance.
Underproofing and overproofing are also common challenges for beginner bakers. Dough that has not fermented enough may bake into a heavy loaf, while excessively fermented dough can lose structure. Baking in an inadequately preheated oven may also reduce crust quality and oven spring. Paying attention to dough appearance and oven temperature helps prevent these problems.
How to Store Homemade Sourdough-Style Bread
Fresh homemade bread is generally best enjoyed after cooling and within the first day or two. Store the loaf at room temperature in a clean bread container or suitable wrapping material. The ideal storage method depends on whether you prioritize crust crispness or moisture retention. Avoid leaving cut surfaces exposed for extended periods.
Refrigeration is usually not ideal for ordinary homemade bread because it can accelerate staling. Freezing is a better option when you want to preserve bread for longer periods. Slice the cooled loaf before freezing so individual portions are easier to use. Place the slices in suitable freezer-safe packaging to reduce moisture loss and freezer odors.
Frozen bread can be thawed at room temperature or reheated appropriately before serving. Light toasting can restore some surface crispness and improve the eating experience. Avoid storing bread while it is still hot because trapped steam can cause unwanted condensation. Proper cooling and storage help maintain better flavor and texture.
Delicious Ways to Serve Sourdough-Style Bread
Homemade sourdough-style bread is versatile enough to complement breakfast, lunch, and dinner. Fresh slices taste delicious with butter, honey, fruit preserves, or other preferred toppings. Toasting enhances the crust and creates a pleasant contrast with the softer interior. Its mild tang also pairs well with both sweet and savory ingredients.
For lunch, the bread can be used to make sandwiches with vegetables, cheese, eggs, or other fillings. Slightly thicker slices work well for grilled sandwiches because they maintain structure during heating. The crust provides texture while the center remains relatively soft. Choosing fresh ingredients creates a satisfying homemade meal.
Sourdough-style bread also works beautifully alongside soups, salads, and cooked vegetables. Leftover slices can be transformed into croutons or breadcrumbs rather than discarded. Bread that has become slightly firm may still be suitable for toasted dishes. These serving ideas make homemade baking more practical and help reduce unnecessary food waste.
Conclusion
Making sourdough bread without starter is a convenient way to enjoy homemade artisan-style bread without maintaining a traditional fermented culture. By using commercial yeast, bread flour, water, salt, and optional acidic ingredients, beginners can create a loaf with a crisp crust and pleasantly tangy flavor. Although it is not authentic naturally leavened sourdough, the recipe provides an enjoyable alternative.
Successful results depend on proper ingredient measurements, gentle dough handling, sufficient fermentation, and appropriate baking temperatures. Stretch-and-fold techniques can strengthen the dough, while a Dutch oven helps develop a beautifully browned crust. Allowing the bread to cool before slicing also improves the finished texture. Small adjustments become easier with practice and experience.
Whether you are baking for the first time or looking for a simpler homemade bread recipe, this method offers flexibility and satisfying results. Experiment with fermentation times and suitable flavor ingredients after mastering the basic preparation. With patience and a few everyday ingredients, you can enjoy fresh sourdough-style bread directly from your own kitchen.
Frequently Asked Questions
Can You Make Real Sourdough Bread Without a Starter?
Traditional sourdough requires a naturally fermented culture containing wild yeast and bacteria. Without a starter, commercial yeast can produce similar artisan-style bread, but the fermentation process and flavor are different.
What Can I Use Instead of Sourdough Starter?
Commercial baker’s yeast can replace the leavening function of sourdough starter. Small amounts of plain yogurt or vinegar may provide tangy flavor, but they do not recreate traditional sourdough fermentation.
How Long Does Sourdough Bread Without Starter Take to Make?
A basic commercial yeast version may take approximately three to four hours, including preparation, rising, baking, and initial cooling. Actual timing depends on room temperature and dough fermentation.
Why Is My Sourdough-Style Bread Dense?
Dense bread can result from insufficient fermentation, excessive flour, weak gluten development, or improper proofing. Measuring ingredients accurately and observing dough expansion can help improve the finished texture.
Can I Make Sourdough-Style Bread Without a Dutch Oven?
Yes, you can bake the bread on a suitable baking tray or stone using an appropriate oven-safe steam method. A Dutch oven is convenient but not essential for producing a crusty loaf.