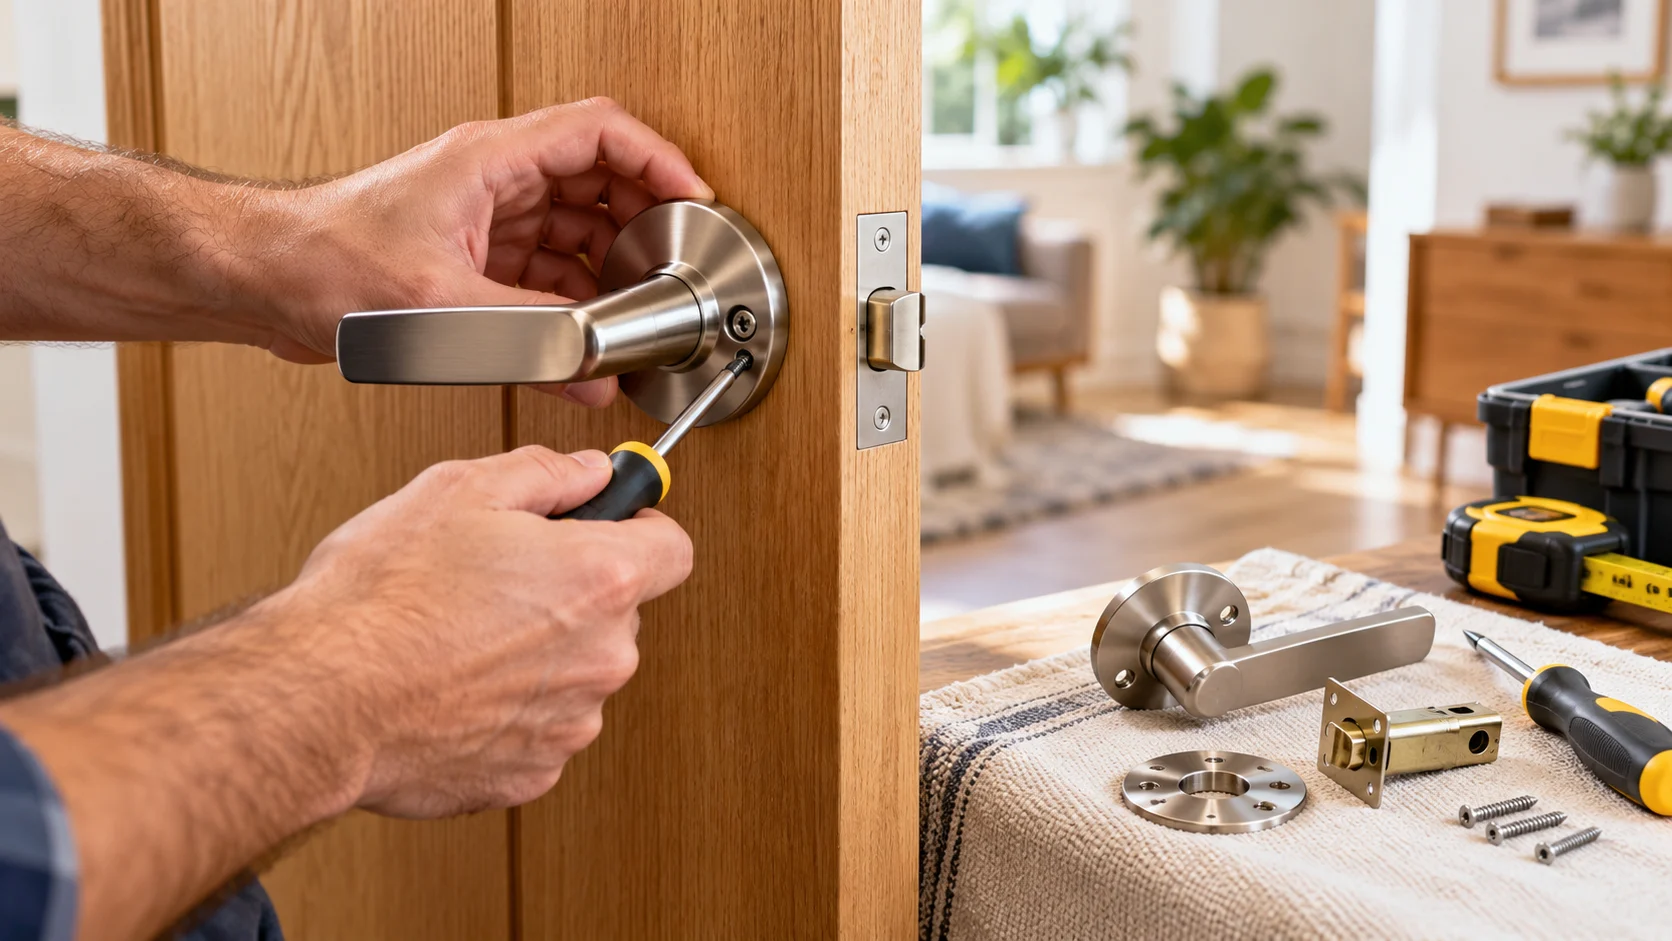
Replacing a door handle is one of the simplest home improvement projects that can make a noticeable difference in your home’s appearance and functionality. Whether your existing handle is loose, damaged, outdated, or difficult to operate, installing a new one can improve everyday convenience. With basic household tools and a little patience, many homeowners can complete a straightforward door handle replacement without professional assistance.
Learning how to replace a door handle involves understanding the existing hardware, choosing a compatible replacement, and following the correct installation steps. Although most standard interior door handles use a similar installation process, different locksets and door designs may require additional attention. This step-by-step guide explains everything from removing the old handle to testing the new hardware and keeping it in good condition.
Understand When You Need to Replace a Door Handle
Door handles experience frequent use, which can gradually affect their appearance and performance. Over time, screws may loosen, internal components may wear out, or the handle may become difficult to turn. Recognizing these problems early can help prevent inconvenience and ensure that doors continue opening and closing properly.
A loose handle is one of the most common signs that door hardware needs attention. However, tightening its mounting screws may solve the problem without requiring a complete replacement. If the handle remains unstable, the internal spring mechanism fails, or the latch no longer operates correctly, installing new hardware may be a better long-term solution.
Appearance is another reason homeowners decide to replace door handles throughout their property. Updating old brass hardware with a modern finish can refresh a room without major renovations. Matching door handles with hinges, cabinet hardware, and surrounding fixtures can also make interior spaces feel more coordinated and visually appealing.
Choose the Right Replacement Door Handle
Selecting a compatible replacement is one of the most important parts of a successful door handle installation. Door handles come in several styles, including traditional round knobs, lever handles, passage handles, privacy sets, and keyed entry locksets. Each style serves a different purpose, so consider where the door is located and whether it requires a locking function.
Passage handles are commonly used on hallway and closet doors where locking is unnecessary. Privacy handles are generally designed for bathrooms and bedrooms, while keyed entry handles are intended for doors requiring additional security. Exterior doors may also need weather-resistant hardware and a suitable security rating, depending on the existing door and lock system.
Before purchasing a replacement, compare the new handle’s specifications with the old hardware and door measurements. Check the backset, door thickness, bore-hole diameter, and latch dimensions to avoid installation difficulties. Choosing compatible hardware can save time and prevent unnecessary drilling or alterations to the door.
Gather the Tools Needed for Door Handle Replacement
Most standard door handle replacements require only a few basic tools commonly found in household toolboxes. A Phillips-head screwdriver is often sufficient for removing visible mounting screws and installing the replacement hardware. Some handles may also require a flathead screwdriver, Allen key, or manufacturer-specific release tool for hidden fastening mechanisms.
A measuring tape is useful for confirming the door thickness, backset, and existing hardware dimensions. Keep a small container nearby to hold removed screws and other components so they do not become lost. A clean cloth can also help protect the door surface and remove dust or debris from around the installation area.
Additional tools may be necessary when replacing hardware that does not match the existing door openings. However, drilling new holes or modifying the door should not be necessary for a compatible standard replacement. Always review the manufacturer’s instructions before beginning because different handle designs may use slightly different fasteners and installation methods.
Measure the Door Before Installing a New Handle
Accurate measurements help ensure that your replacement door handle fits properly and operates smoothly. The backset is the distance between the edge of the door and the center of the handle’s main bore hole. Common residential backsets include approximately 60 millimeters and 70 millimeters, although measurements vary by manufacturer and region.
Door thickness is another important measurement because handles are designed to fit specific thickness ranges. Measure across the door edge rather than estimating its size by appearance. If the door is unusually thick or thin, you may need hardware specifically designed for that construction or an approved installation kit.
Also inspect the existing latch opening and the position of the strike plate on the door frame. The new latch should fit the existing recess without forcing the components into place. Recording these measurements before shopping makes it easier to identify suitable replacement hardware and reduces the chance of compatibility problems.
Prepare the Door and Workspace Before Starting
Preparing your workspace makes replacing a door handle safer and more convenient. Start by opening the door and keeping it securely in position throughout the installation. A suitable doorstop can prevent unexpected movement while you remove screws and handle components.
Place your tools, replacement hardware, and installation instructions within easy reach before beginning. Check that the new package contains the latch assembly, handle components, mounting screws, and any required strike plate. Comparing these parts with the existing hardware helps identify missing or incompatible components before the original handle is completely removed.
Protect nearby flooring and finished surfaces from accidentally dropped tools or metal hardware. If the door has an electronic lock, review the manufacturer’s power-disconnection instructions before handling its components. For ordinary mechanical handles, the main preparation involves securing the door, organizing the parts, and understanding how the existing hardware is attached.
Step 1: Remove the Old Door Handle
Begin removing the old door handle by locating its mounting screws or release mechanism. On many standard handles, the screws are visible on the interior side of the door. Use the appropriate screwdriver to loosen them carefully while supporting the handle to prevent it from falling.
Some modern handles conceal their screws beneath a decorative cover plate, also called a rose or rosette. These designs may include a small release hole or slot that allows the handle and cover to be removed. Follow the manufacturer’s instructions and avoid forcing the cover because aggressive prying can scratch the finish or damage the door.
Once the mounting screws are removed, gently separate the interior and exterior handle assemblies. Pull each component straight away from the door while checking for any remaining attachments. Keep the removed parts together until the replacement is fully installed, especially if you need to compare their dimensions or identify an unfamiliar component.
Step 2: Remove the Existing Latch Mechanism
The latch mechanism sits inside the edge of the door and connects the handle to the closing system. After removing the handles, locate the small screws holding the latch faceplate in position. Unscrew them carefully and place the fasteners with the other removed hardware.
Gently slide the latch assembly out through the opening in the door edge. If it feels stuck, inspect the opening for paint buildup or remaining screws before applying pressure. Avoid using excessive force because the surrounding wood, decorative finish, or internal components could become damaged.
Compare the removed latch with the replacement assembly before continuing. Check the length, faceplate shape, backset, and overall design to confirm that the new component fits correctly. Some replacement handles include adjustable latches, which must be set to the correct backset according to the manufacturer’s instructions.
Step 3: Install the New Door Latch
Insert the new latch assembly into the existing opening along the door edge. Make sure the latch bolt faces the correct direction so it can retract smoothly when the door closes. For a typical spring latch, the sloped side should face the strike plate as the door swings shut.
Position the latch faceplate so it sits evenly against the edge of the door. The plate should fit the existing recess without bending or requiring excessive pressure. If the latch includes an adjustable backset, confirm that the adjustment is correct before securing the component.
Insert the supplied mounting screws and tighten them gradually using the appropriate screwdriver. The latch should remain secure without the faceplate becoming distorted or the surrounding wood splitting. Test the latch movement gently before continuing, making sure it slides and returns without sticking or unusual resistance.
Step 4: Attach the New Door Handle
With the latch installed, position the exterior handle assembly against the appropriate side of the door. Guide its spindle or connecting mechanism through the latch assembly according to the manufacturer’s instructions. Correct alignment is important because the spindle transfers handle movement to the latch mechanism.
Next, position the interior handle assembly against the opposite side of the door. Align the mounting posts, connecting components, and screw holes without forcing the pieces together. If the handle does not sit flat, remove it and inspect the alignment rather than attempting to pull the components into place with screws.
Once both sides are correctly positioned, insert the mounting screws and tighten them evenly. Alternate between the screws to maintain balanced pressure and prevent the handle from becoming misaligned. Avoid overtightening because excessive pressure may interfere with the mechanism or damage the door surface.
Step 5: Check the Handle Alignment and Operation
After installing the new door handle, check that both sides sit securely and evenly against the door. The decorative plates should lie flat, and the handle should not wobble excessively when moved. A slightly loose or crooked assembly may indicate incorrectly aligned components or mounting screws that need adjustment.
Operate the handle several times while keeping the door open. Watch the latch bolt as you turn or press the handle to confirm that it retracts completely and returns smoothly. Testing the mechanism before closing the door helps identify installation problems without accidentally trapping the door in a closed position.
If the handle feels stiff, inspect the mounting screws and confirm that the spindle is correctly positioned. Screws that are too tight can sometimes restrict movement in certain handle designs. Make small adjustments and test again, following the manufacturer’s instructions until the mechanism operates consistently.
Step 6: Test the Door Latch and Strike Plate
The strike plate is the metal component attached to the door frame that receives the latch bolt. When the door closes, the latch should enter the strike plate opening without excessive friction. Proper alignment ensures that the door remains securely closed while still opening smoothly when the handle is operated.
Close the door slowly while maintaining control of the handle, and observe whether the latch aligns with the strike plate. If the door requires force to close, check for an alignment problem rather than pushing it harder. Sometimes a small adjustment to the strike plate position is necessary when installing replacement hardware.
Before considering the project complete, open and close the door several times to confirm consistent performance. Test any privacy or locking function with the door open first, following the manufacturer’s directions. For exterior doors, verify that all locking components engage properly and that the door can still be opened safely from the inside.
Fix Common Problems After Replacing a Door Handle
A newly installed door handle may occasionally feel loose, stiff, or difficult to operate. These issues often result from incorrect alignment, loose mounting screws, or incompatible components. Checking the installation carefully can help identify the cause without immediately removing the entire assembly.
If the latch does not retract properly, inspect the spindle connection and confirm that the handle components are positioned correctly. When the door does not close smoothly, check whether the latch aligns with the strike plate. Small corrections may solve the problem, but damaged components should be replaced rather than forced into operation.
Persistent problems can indicate that the replacement handle is unsuitable for the door’s existing dimensions. Comparing the hardware specifications with your measurements can reveal compatibility issues. If the door contains a complicated multipoint locking system or electronic mechanism, professional assistance may be appropriate to avoid damaging the locking assembly.
Replace Interior and Exterior Door Handles Correctly
Interior and exterior door handles may look similar, but their installation requirements can differ significantly. Interior handles often have simple passage or privacy mechanisms, while exterior hardware may include more advanced locking features. Understanding these differences helps homeowners choose appropriate replacements and avoid compromising door security.
An interior bedroom or hallway handle can often be replaced without changing the surrounding door hardware. However, exterior doors may have separate deadbolts, interconnected locks, or multipoint locking systems requiring specific compatible components. Replacing one part without understanding its relationship to the entire locking system can cause operational problems.
Weather resistance is another consideration when selecting exterior door hardware. Handles exposed to rain, humidity, and temperature changes should have finishes and materials suitable for outdoor conditions. Following the hardware manufacturer’s installation instructions and confirming secure operation are particularly important when working on main entry doors.
Maintain Your New Door Handle for Long-Term Use
Regular maintenance helps keep a newly installed door handle working smoothly and looking attractive. Dust, fingerprints, and everyday dirt can accumulate around the handle and decorative plate over time. Cleaning these areas with a soft cloth can prevent buildup and preserve the appearance of the hardware.
Use cleaning products recommended by the manufacturer because different finishes respond differently to household chemicals. Abrasive cleaners may scratch polished surfaces, while harsh products can damage protective coatings. Avoid applying excessive water near the latch mechanism, especially on wooden doors where moisture may affect the surrounding material.
Periodically check the mounting screws and handle movement for signs of loosening or wear. If the latch begins sticking, investigate the cause before applying lubricants or making adjustments. With suitable care and prompt attention to minor problems, a quality door handle can continue functioning reliably for many years.
Know When to Hire a Professional Locksmith
Although many standard door handle replacements are suitable for basic DIY maintenance, some installations require specialized knowledge. Complicated locking systems, damaged door frames, and unusual hardware arrangements can make replacement more difficult. Attempting to modify these systems without understanding their construction may lead to security or operational problems.
A professional locksmith can assess compatibility, identify damaged components, and recommend suitable replacement hardware. Professional assistance is particularly useful for multipoint locks, electronic access systems, and exterior doors with complex security requirements. It may also be appropriate when existing holes no longer support the new handle securely.
Homeowners should also seek assistance if the replacement handle repeatedly fails to latch or lock correctly after installation. Door security and reliable operation are more important than completing a repair without help. Recognizing when professional expertise is needed can prevent further damage and help ensure the finished installation functions as intended.
Conclusion
Learning how to replace a door handle is a practical home maintenance skill that can improve convenience, functionality, and interior appearance. Most standard mechanical handles can be changed using basic tools when the replacement hardware matches the existing door dimensions. Taking accurate measurements and following the correct installation sequence helps make the process easier.
The main steps involve removing the old handle, replacing the latch, positioning the new components, and securing the mounting screws. Careful alignment and repeated testing are essential for ensuring that the handle operates smoothly. Avoid forcing incompatible parts, overtightening screws, or closing the door before confirming that the latch retracts correctly.
With regular cleaning and occasional inspections, a properly installed door handle can remain reliable for years. However, complex locking systems and damaged doors may require professional assistance. Whether you are updating your home’s appearance or replacing worn hardware, a thoughtful approach can help you achieve a secure and functional result.
FAQs
Can I replace a door handle myself?
Yes, many standard interior door handles can be replaced using a screwdriver and compatible hardware. Follow the manufacturer’s instructions, keep the door open during installation, and test the latch carefully before closing it.
What tools do I need to replace a door handle?
Most replacements require a Phillips-head screwdriver, measuring tape, and sometimes a flathead screwdriver or Allen key. Certain handle designs may also include a special release tool for removing concealed fasteners.
How long does it take to replace a door handle?
A straightforward replacement often takes approximately 15 to 30 minutes when the new hardware fits existing holes. More complicated installations may require additional time for adjustments, compatibility checks, or professional assistance.
Can I replace a door handle without changing the lock?
Sometimes, depending on the hardware design and whether the handle and lock are separate components. Integrated locksets may require replacing additional parts, so check compatibility before purchasing a new handle.
Why is my new door handle not working properly?
Common causes include misaligned components, incorrect spindle positioning, overtightened screws, or an improperly aligned strike plate. Check the installation instructions and test the mechanism with the door open before making adjustments.