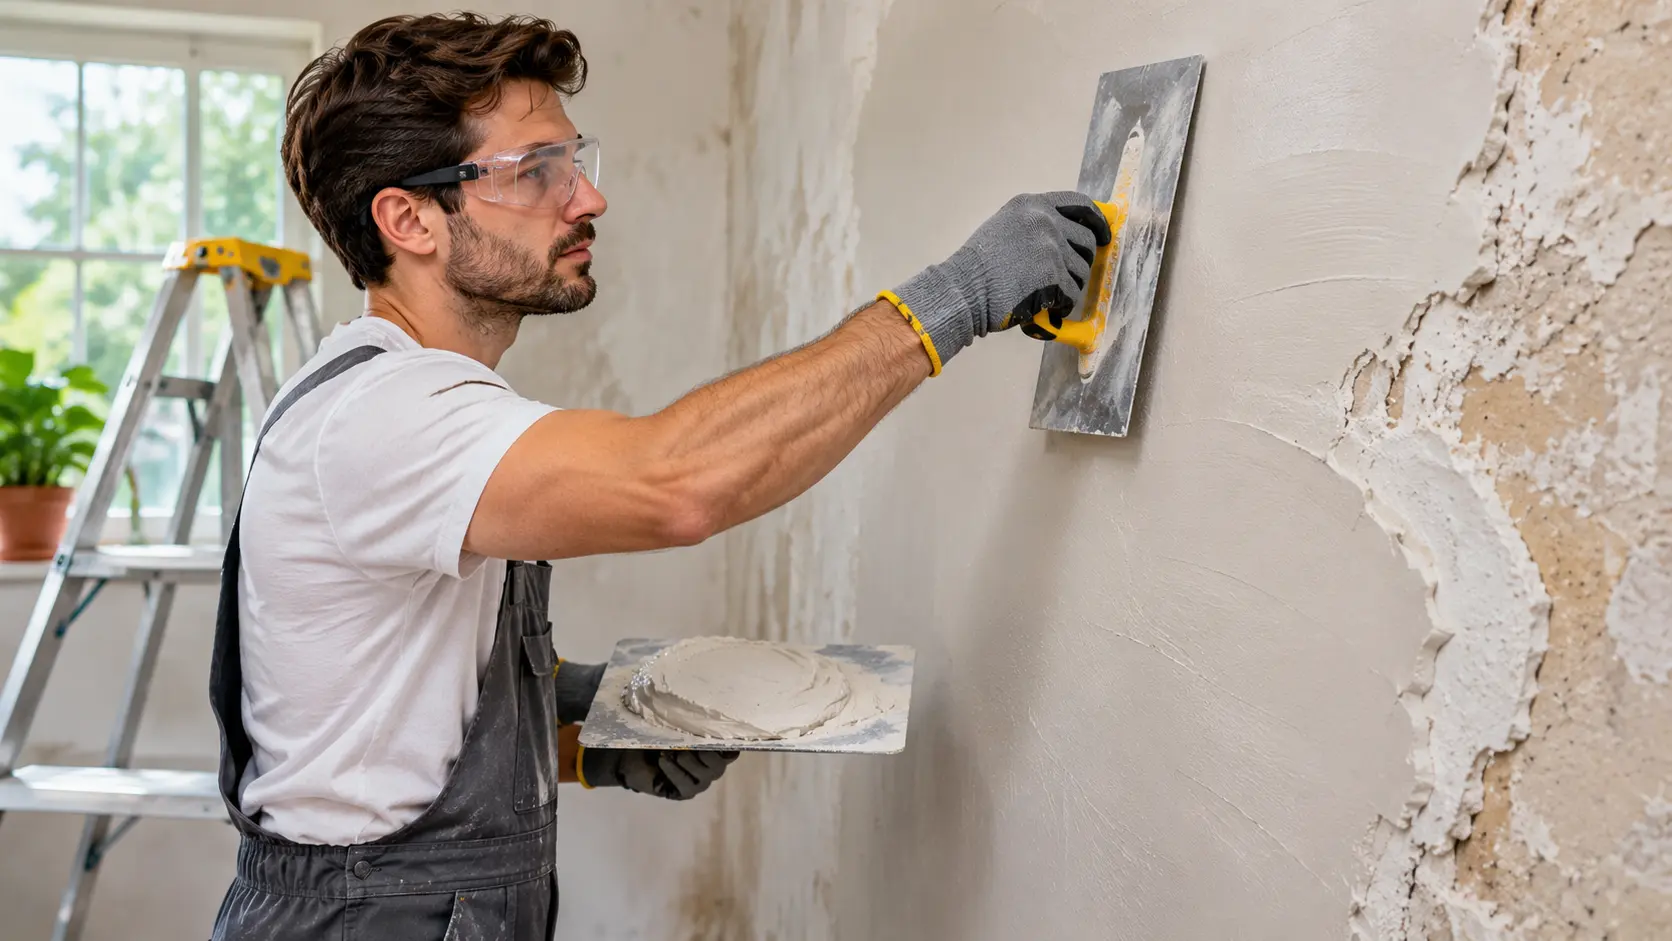
Replastering a wall is a practical way to repair damaged surfaces, cover imperfections, and create a smooth finish before painting or decorating. Over time, plaster can develop cracks, loose patches, uneven textures, and other signs of wear. Learning how to replaster a wall correctly can help restore its appearance and prevent common problems during renovation.
The process involves preparing the surface, removing damaged material, applying suitable plaster, and creating an even finish. Although small repairs can be manageable for beginners, larger plastering projects require patience, appropriate tools, and careful preparation. Using the wrong materials or rushing the drying process can lead to cracking, poor adhesion, and uneven results.
This guide explains how to replaster a wall step by step, including the tools you need, surface preparation, plaster application, drying times, and finishing techniques. You will also discover common mistakes to avoid and practical tips for achieving a durable, smooth wall.
What Does It Mean to Replaster a Wall?
Replastering a wall means repairing or replacing existing plaster to restore a smooth, stable surface. The process may involve removing loose plaster, applying new base coats, or covering sound existing plaster with a thin finishing layer. The correct method depends on the condition and construction of the wall.
Some walls only require skimming, which involves applying a thin coat of finishing plaster over a suitable existing surface. Others need more extensive repairs because the original plaster has detached, crumbled, or become badly damaged. These situations require different preparation techniques and materials.
Replastering can improve the appearance of interior walls while providing a suitable foundation for decoration. However, plaster should not be used to conceal active dampness, structural movement, or serious underlying damage. Identifying the cause of deterioration is essential before beginning repairs.
When Should You Replaster a Wall?
A wall may need replastering when the existing surface becomes uneven, cracked, loose, or difficult to repair with ordinary filler. Small cosmetic defects often require only localized repairs. Larger areas of damaged or detached plaster may need more extensive treatment.
Signs of plaster failure include hollow-sounding patches, crumbling material, and sections that separate from the underlying wall. Repeated cracking or staining may also indicate a problem requiring investigation. If moisture continues entering the wall, new plaster is unlikely to remain in good condition.
Before deciding to replaster, examine the extent of the damage and consider the wall’s age and construction. Traditional lime plaster, modern gypsum plaster, and cement-based materials have different properties. Choosing an appropriate repair method helps protect the wall and reduces the likelihood of future problems.
What Tools Do You Need to Replaster a Wall?
Having the correct plastering tools makes surface preparation and application easier. Common equipment includes a plastering trowel, hawk board, mixing bucket, mixing paddle, scraper, and straightedge. A suitable brush, clean water, and protective floor coverings are also useful.
A plastering trowel helps spread and smooth the material, while the hawk holds manageable amounts of mixed plaster. A straightedge can help check whether the wall is reasonably even. For small repairs, a filling knife and smaller trowel may provide better control.
Safety equipment is equally important during preparation and mixing. Wear suitable eye protection, gloves, and respiratory protection appropriate to the dust hazard. Follow the material manufacturer’s instructions, and avoid creating unnecessary dust when removing or sanding old plaster.
How to Choose the Right Plaster for Your Wall
Choosing the correct plaster depends on the wall’s substrate, location, and existing materials. Gypsum finishing plaster is commonly used on suitable dry interior surfaces. Base-coat plasters, repair mortars, and lime-based products serve different purposes and should not be treated as interchangeable.
For example, a modern interior wall may be suitable for a compatible gypsum repair system. An older solid masonry wall originally finished with lime plaster may need a breathable lime-based repair. Using an unsuitable dense material can sometimes trap moisture or contribute to further deterioration.
Always check the manufacturer’s guidance for compatible substrates, coat thicknesses, and preparation products. If you are unsure whether the wall contains lime, gypsum, cement, or another material, seek professional advice. Material compatibility is more important than choosing a product simply because it is inexpensive.
Step 1: Inspect the Wall Before Replastering
Begin by examining the wall for cracks, loose plaster, stains, bulges, and other visible problems. Gently tapping selected areas may help identify hollow-sounding sections, although this does not provide a complete assessment. Mark the areas that appear damaged or unstable.
Check whether the wall shows signs of continuing moisture problems, such as persistent damp patches or peeling finishes. Replastering before fixing a leak or moisture source can lead to repeated failure. Significant cracks, ongoing movement, or large bulges may require assessment by a qualified professional.
Older buildings deserve particular care because traditional plaster systems may need specialist repair. Before disturbing old coatings, consider possible lead paint or asbestos-containing materials, especially in buildings of uncertain age. Arrange appropriate testing when there is a reasonable possibility of hazardous materials.
Step 2: Protect the Room and Prepare Your Workspace
Replastering can create dust, splashes, and debris, so protecting the surrounding room is an important first step. Move furniture away from the wall whenever possible. Cover floors and nearby surfaces with suitable protective sheeting.
Remove wall decorations and detachable fittings that interfere with the work. Identify electrical outlets, switches, pipes, and cables before scraping or removing plaster. Isolate electrical circuits where necessary and use qualified tradespeople for work involving electrical installations.
Keep your tools organized and ensure the room has appropriate ventilation. Use a stable working platform when reaching higher sections rather than balancing on furniture. A well-prepared workspace makes plaster application easier and helps reduce avoidable damage.
Step 3: Remove Loose and Damaged Plaster
Loose or detached plaster should generally be removed before applying new material. Use a suitable scraper or hand tool to lift damaged sections carefully. Avoid aggressive removal that could damage sound plaster, underlying masonry, or concealed building services.
Work gradually from unstable sections toward firm surrounding material. If the remaining plaster is solid and compatible with the proposed repair system, it may not need complete removal. Large damaged areas or ceilings can require specialist assistance because falling material presents additional hazards.
Collect debris as you work and avoid dry sweeping or uncontrolled dust generation. Follow applicable precautions for silica-containing materials and potentially hazardous old coatings. Once the damaged plaster has been removed, inspect the exposed surface for underlying problems.
Step 4: Clean the Wall and Repair the Base Surface
A clean, stable substrate is essential for good plaster adhesion. Remove loose dust, flaking paint, and other contaminants using methods suitable for the wall material. The surface should be prepared according to the requirements of the chosen plaster system.
Examine the wall for deep holes, open joints, and uneven areas. Significant defects may require a compatible base coat or repair mortar before applying finishing plaster. Filling large cavities with a thin finishing product can cause shrinkage, cracking, or poor adhesion.
Allow any preliminary repairs to reach the required condition before continuing. The appropriate waiting period depends on the repair material and environmental conditions. Following the manufacturer’s instructions helps prevent problems caused by applying new coats too soon.
Step 5: Control Wall Suction and Apply the Correct Primer
Different wall surfaces absorb moisture at different rates, which can affect how plaster sets and bonds. Highly absorbent masonry may draw water from fresh plaster too quickly. Very smooth or nonabsorbent surfaces may require a different preparation approach to achieve reliable adhesion.
Depending on the substrate and plaster system, preparation may involve controlled dampening, a bonding agent, or a manufacturer-approved primer. For example, some gypsum finishing systems require a compatible primer over painted or low-suction surfaces. These products should not be selected interchangeably.
Apply the recommended preparation treatment according to its instructions, including any required drying or tackiness stage. Using too much water or an unsuitable bonding product can create adhesion problems. If the wall has an unusual coating or an older plaster finish, confirm compatibility before proceeding.
Step 6: Mix the Plaster to the Right Consistency
Proper mixing helps create a workable plaster that spreads smoothly across the wall. Begin with a clean mixing bucket and measure water according to the product instructions. Add the plaster powder as directed, using a suitable mixing paddle when recommended.
Mix until the material reaches the specified consistency without dry lumps. Many finishing plasters should be smooth and workable rather than excessively runny. However, different plaster products have different water requirements, so avoid relying on one universal mixing ratio.
Only prepare an amount that can be applied within the manufacturer’s stated working time. Plaster that has started setting should not be revived by adding extra water. Clean tools and equipment between batches to prevent hardened residue from affecting fresh material.
Step 7: Apply the First Coat of Plaster
Once the wall is prepared, begin applying plaster using a clean trowel and suitable technique. Work from a manageable section, spreading the material evenly across the surface. Maintain the coat thickness recommended for the product rather than applying an unnecessarily heavy layer.
Hold the trowel at a comfortable angle and use steady overlapping strokes. Focus on achieving consistent coverage rather than trying to create a perfect finish immediately. Working systematically helps prevent missed areas and makes it easier to control the surface.
For a typical two-coat skim system, the first coat establishes coverage and begins leveling minor imperfections. Deeper repairs may require a separate base-coat plaster before finishing. Always follow the selected system’s instructions because coat requirements vary between materials.
Step 8: Level the Surface and Remove Major Imperfections
After applying the initial coat, examine the wall for ridges, deep trowel marks, and uneven areas. Use the trowel or a suitable straightedge to improve the surface while the plaster remains workable. Avoid repeatedly disturbing areas that have already begun setting.
Keep your movements smooth and controlled. Applying excessive pressure can pull material away from the wall or create new marks. The goal at this stage is to establish a reasonably even surface before the next finishing operation.
Pay particular attention to corners, edges, and transitions between repaired and existing plaster. These areas can become noticeable after painting if they are not blended carefully. Check the surface from different angles, but avoid expecting the first coat to look completely finished.
Step 9: Apply the Second Coat of Plaster
Some plastering systems use a second finishing coat to improve smoothness and coverage. The correct timing depends on the first coat’s condition and the manufacturer’s instructions. Applying the next layer at the wrong stage can interfere with bonding or finishing.
Spread the second coat in a thin, even layer using controlled trowel movements. Work across the wall systematically and maintain the specified thickness. Avoid trying to correct major underlying defects with a finishing coat that is designed only for shallow application.
The second coat should help reduce minor irregularities and create a more consistent surface. However, not every plaster product requires or permits the same two-coat process. Follow the technical guidance for the material rather than assuming all finishing plasters behave identically.
Step 10: Smooth and Finish the Plastered Wall
Final troweling helps remove small ridges and create a consistent surface before the plaster hardens. Work while the material is at the appropriate setting stage for finishing. The correct timing varies with product type, room temperature, and substrate suction.
Use smooth, overlapping strokes and apply only the pressure needed to flatten minor imperfections. Some plaster systems permit carefully controlled use of water during finishing, while others have different instructions. Excess water or repeated polishing can weaken or damage certain finishes.
Inspect the completed surface under suitable lighting to identify obvious defects. A good wall finish should be reasonably even and suitable for its intended decoration. Small imperfections can sometimes be corrected after drying, but major unevenness may require additional compatible repair work.
How Long Does Replastered Wall Take to Dry?
Plaster drying time depends on the material, coat thickness, wall construction, ventilation, and surrounding temperature. Thin gypsum finishing coats may dry within several days under suitable conditions. Thicker plaster systems and lime-based materials can require substantially longer periods.
Fresh gypsum plaster commonly changes from a darker appearance to a lighter, more uniform color as moisture leaves the material. However, appearance alone does not establish readiness for every coating system. Follow both plaster and paint manufacturers’ guidance before decorating.
Avoid trying to accelerate drying with extreme heat. Excessively rapid drying can affect some plaster systems and contribute to cracking or poor performance. Gentle ventilation and suitable room conditions are generally preferable to directing intense heat at a newly plastered wall.
How to Paint a Newly Replastered Wall
Painting should begin only after the plaster has dried sufficiently and the surface is suitable for decoration. Remove loose dust and check for any imperfections requiring repair. Applying paint too early can trap moisture or interfere with adhesion.
For new gypsum plaster, the first coating may involve a suitable mist coat or a dedicated primer designed for fresh plaster. Use the dilution ratio specified by the paint manufacturer rather than assuming all paints should be watered down. Some modern products are intended for direct application without dilution.
Once the initial coat has dried as directed, apply the remaining paint layers according to product instructions. Use appropriate rollers or brushes to create even coverage. If the wall has been finished with lime plaster, choose a compatible breathable decorating system rather than automatically using standard emulsion paint.
How to Replaster a Wall With Cracks
Cracked plaster requires careful assessment before repair because not all cracks have the same cause. Fine surface cracks may result from shrinkage or minor movement. Larger, recurring, or widening cracks can indicate problems that should be investigated before applying new plaster.
For small stable cracks, remove loose material and use a compatible repair filler or plaster system. Some repairs may require reinforcement mesh or tape where specified by the manufacturer. Simply covering an active crack with finishing plaster may allow the crack to return.
If cracks repeatedly reopen, become wider, or occur alongside structural movement, seek professional assessment. Repairs should address the underlying cause rather than only hiding the visible damage. This approach improves the chance of achieving a durable finish.
How to Replaster an Old Wall Safely
Older buildings may contain plaster systems that differ from modern gypsum finishes. Traditional lime plaster is often used on older solid masonry walls because of its compatibility with historic construction. Replacing it with an unsuitable material can sometimes cause moisture-related problems.
Before removing old plaster, determine whether the existing material is sound and whether local repairs would be more appropriate. Preserving stable original plaster may reduce unnecessary work. Older buildings can also contain decorative features or historic finishes that deserve careful treatment.
Hazardous materials are another consideration when disturbing older surfaces. Lead-containing paint and certain asbestos-containing products may require specialist testing or removal. When the building’s construction is uncertain, professional guidance is safer than aggressive scraping or demolition.
How to Replaster a Small Damaged Area
Small plaster repairs are often more manageable for beginners than an entire wall. Begin by removing loose material and cleaning the affected area. Check that the surrounding plaster remains firmly attached before applying a suitable repair compound.
Choose a product designed for the depth and substrate of the damaged section. Shallow imperfections may be repaired with an appropriate filler, while deeper areas may require a base coat followed by finishing material. Avoid exceeding the recommended thickness in a single application.
After the repair has set and dried according to instructions, inspect the surface for uneven edges. Light finishing work may help blend the patch with surrounding plaster. Prime and decorate the area using a compatible system once it is ready.
How Much Does It Cost to Replaster a Wall?
The cost of replastering depends on wall size, existing damage, material choice, and local labor rates. A small patch repair is generally less expensive than removing and replacing plaster across an entire room. Difficult access and extensive preparation can also increase costs.
Professional estimates may include surface preparation, waste removal, bonding materials, base coats, finishing coats, and labor. Older walls or moisture-damaged surfaces sometimes require additional work. Comparing estimates is easier when each contractor describes exactly what the quoted price includes.
If you plan to complete a small repair yourself, account for tools, materials, protective equipment, and cleanup supplies. A professional may be more economical for extensive or technically demanding work. The cheapest immediate option is not always the best value if poor preparation leads to repeated repairs.
Common Mistakes When Replastering a Wall
One common mistake is applying new plaster over loose, dusty, or unstable material. Poor preparation can prevent the fresh plaster from bonding properly. Removing damaged sections and preparing the substrate correctly helps reduce the risk of future peeling or detachment.
Another mistake is mixing plaster with too much water or using material after it has begun setting. Incorrect consistency can make application difficult and affect the finished surface. Following the manufacturer’s mixing and working-time instructions supports more predictable results.
Rushing drying and decoration is also a frequent problem. Painting before the plaster is ready can contribute to coating failure or trapped moisture. Allowing sufficient drying time and addressing underlying dampness helps create a more durable result.
How to Prevent Cracks in Newly Applied Plaster
Preventing cracks begins with using materials compatible with the existing wall. Applying excessive thickness, preparing the surface incorrectly, or allowing certain plasters to dry too quickly can contribute to cracking. Following the manufacturer’s instructions helps reduce these risks.
Substrate movement can also cause cracks regardless of application technique. For example, movement around joints or transitions between different materials may require suitable reinforcement or specialist detailing. Covering these areas without addressing movement can lead to recurring defects.
Maintain appropriate room conditions during application and drying. Avoid sudden extreme heating, strong direct airflow, or other conditions that conflict with the material’s curing requirements. If significant cracking develops, investigate the cause before applying another finishing layer.
How to Achieve a Smooth Professional Plaster Finish
A smooth plaster finish depends on preparation, material consistency, application technique, and timing. Begin with a stable wall and use suitable tools for the chosen plaster system. Working in manageable sections helps maintain control over the surface.
Use overlapping trowel strokes and maintain consistent pressure throughout application. Avoid repeatedly working over areas after the material becomes too firm. Practicing on a small section can help beginners understand how the plaster changes as it sets.
Good lighting can reveal surface imperfections that are difficult to notice during application. Check corners, edges, and repaired transitions before the plaster becomes fully hard. A professional finish comes from consistent technique rather than excessive polishing or unnecessary additional coats.
When Should You Hire a Professional Plasterer?
A professional plasterer may be the better choice when a wall has extensive damage, major unevenness, or complicated underlying conditions. Large surfaces require consistent application and timing, which can be challenging for beginners. Poorly executed repairs may create additional work before decoration.
Professional assistance is particularly valuable for historic lime plaster, recurring dampness, significant cracks, and damaged ceilings. These situations may involve specialist materials or safety concerns. A qualified contractor can assess the wall and recommend an appropriate repair system.
If you are uncertain whether the existing plaster is stable or compatible with modern materials, request advice before beginning. A clear assessment can prevent unnecessary removal and unsuitable repairs. Hiring a professional is often worthwhile when the work exceeds your experience or available equipment.
How to Maintain a Newly Replastered Wall
Maintaining a replastered wall begins with allowing the material to dry and finish curing as required. Avoid painting, attaching fixtures, or applying unnecessary pressure before the surface is ready. Following the product instructions helps protect the new finish.
After decoration, keep indoor moisture and ventilation at appropriate levels. Repair plumbing leaks and other sources of dampness promptly. Persistent moisture can damage plaster and paint regardless of how carefully the original work was completed.
Inspect the wall occasionally for recurring cracks, stains, or areas of detachment. Small problems may be easier to address when discovered early. If damage returns repeatedly, investigate the underlying cause rather than applying another cosmetic layer.
Conclusion
Replastering a wall can restore damaged surfaces and create a smooth foundation for painting or decorating. Successful results depend on identifying the wall’s condition, choosing suitable materials, and preparing the substrate correctly. Small repairs may be manageable for beginners, while larger projects often benefit from professional expertise.
Following the correct sequence helps reduce common plastering problems. Remove unstable material, prepare the surface, mix plaster accurately, and apply each coat according to the manufacturer’s requirements. Allowing sufficient drying time is equally important for creating a durable finish.
The best way to replaster a wall is to focus on material compatibility, careful preparation, and safe working practices rather than rushing for quick results. Understanding common mistakes can help you avoid unnecessary repairs and expenses. With suitable tools and patience, you can achieve a cleaner, more attractive wall surface.
Frequently Asked Questions About Replastering a Wall
Can You Replaster Over Existing Plaster?
Yes, sound existing plaster can sometimes receive a compatible finishing coat after appropriate preparation. However, loose, damp, or damaged plaster should be assessed and repaired before applying new material.
How Long Does It Take to Replaster a Wall?
Application time depends on wall size, preparation requirements, and the plaster system. A small repair may take a few hours, while full-wall projects can require additional stages and several days of drying.
Do You Need to Remove Old Plaster Before Replastering?
Not always. Stable existing plaster may be suitable for skimming, while loose or detached sections generally require removal. The appropriate approach depends on the substrate, moisture conditions, and compatibility of the materials.
How Long Should Plaster Dry Before Painting?
Thin gypsum finishing coats may dry within several days, but thicker and lime-based plasters can take longer. Follow the plaster and paint manufacturers’ instructions and confirm that the wall is sufficiently dry.
Can Beginners Replaster a Wall Themselves?
Beginners can often complete small plaster repairs with suitable materials, tools, and preparation. However, extensive damage, historic walls, structural cracks, and large plastering projects may require professional assessment and skilled application.